Hello everyone,
we recently launched a new website...and now host our blog here:
GNARLY BLOG
Please come join us at our new site...we have an awesome new blog post about our latest video:
RAMBO DAY.
We hope to see you there...have an awesome day!
Monday, February 9, 2015
Tuesday, August 13, 2013
a gnarly TRAVEL bag.
People often ask us what camera and lenses we recommend using while traveling. So, in this post we decided to explain our go-to travel pack, plus some tips and tricks we've learned along the way. Enjoy...and be sure to give us your input/suggestions.


Over the years, we've done a bit of traveling + shooting, and have narrowed our travel bag down to what we feel are the absolute essentials. Everything you see here allows us to capture high quality video + stills, without being too bulky or too heavy. In our experience, the lighter the better.
If you don't own any of this equipment, we highly recommend renting it though LensProToGo.com. We do this all the time, and it has been an amazing asset for our company and travels....we consider them to be an essential part of our team now.
They have always been extremely friendly and super helpful/knowledgeable...so we urge you to check them out. The website is very simple to use and whatever you need, they will ship directly to your door. Check on shipping times in your area...we are lucky to live in RI because it comes to us next day...which is awesome.
If you want to give them a try, they are currently running a promotion for 10% off any rentals for anyone referring to the title of our latest video, CHOICE.
3. during checkout, enter promo code: CHOICE
Boom. 10% off. (US residents only)
Ok...now, lets get down to business:
Boom. 10% off. (US residents only)
Ok...now, lets get down to business:

Canon 5D MKIII 14mm 2.8, 24mm 1.4, 50mm 1.4, 70-200mm 2.8 IS
Canon 5D mkIII.
This is an awesome camera to travel with for video + stills. It is very small, light weight, durable, and has a full frame sensor. This camera is just the perfect travel camera in our opinion.
***A neckstrap (or something cooler) can be very important for travel shooting***
***A neckstrap (or something cooler) can be very important for travel shooting***
14mm f/2.8.
The 14mm is the widest lens we travel with, and is one of our favorites. If you are going anywhere with huge landscapes, mountains, canyons, etc. You are going to want something wide enough to truly capture the size and immensity of these places....which this lens does very well. Plus it is great for any motion shots like out of a car window, train, boat, etc.
***16-35mm 2.8 could be a more-versatile alternative to the 14mm...and could cover the 24mm as well...but it will sacrifice the beautiful bokeh/low-light capabilities of the 24mm 1.4. Choose wisely, my friends :) ***
CLICK HERE for full Specs & Info.
***16-35mm 2.8 could be a more-versatile alternative to the 14mm...and could cover the 24mm as well...but it will sacrifice the beautiful bokeh/low-light capabilities of the 24mm 1.4. Choose wisely, my friends :) ***
24mm f/1.4
The 24mm might be the lens we use the most. This lens is absolutely awesome. It's wide enough to shoot hand held, and with an aperture of 1.4 you can shoot in very low light situations, which is amazing. If I were to travel with only one lens, this would definitely be it.
50mm f/1.2
The 50mm is a ridiculously beautiful lens to shoot with. This is great for any portrait shots of people you may come across while traveling. With an aperture of 1.2, it has an extremely shallow depth of field and it is also extremely fast, so if you need to shoot without any light, this is going to be your best bet. We would just recommend using a tripod with this lens to avoid the jello monsters (aka: rolling shutter wackiness).
70-200mm f/2.8 IS ***70-200 f/4 IS can be a perfect, lightweight alternative***
The 70-200mm is a great lens to have with you while traveling because of the long reach it provides. This is awesome for shooting mountain ranges, animals, and anything in the distance. Plus it has an image stabilizer, which really comes in handy. Awesome lens. Recently, we've chosen the 70-200 f/4 IS for personal travel shoots + we really fell in love with it because it's waaaaay lighter....and for most things...we didn't need the F2.8 light sensitivity.

GoPro HERO 3
GoPro.
This bad boy is one of the best inventions ever. We always travel with a gopro, and it comes in handy on every trip. Jumping off bridges, snorkeling, hiking, etc. We typically travel with this, a few mounts, some zip ties, and tape...and you can pretty much mount it to anything. You never know what you are going to run into when traveling...so the portability and versatility of this camera is incredible....even though we are still trying to get 1 shot that is as good as anything in their promo video. Conspiracy? :)
CLICK HERE for full Specs & Info.

Batteries + Laptop Charger
We normally travel with two battery chargers and at least (2) batteries...the more the better if you can afford it. The reason we like to travel with (2) chargers, is because a lot of time while traveling, it can be tough to find power outlets. A lot of hostels and hotels might not have working outlets...or you may run into power outages, or other issues with power. So when you do find a place with outlets, its always nice to be able to charge two batteries at the same time, so you can get up the next day and move on to the next destination...fully charged. For laptop charging...we've recently fell in love with the cord extension that comes with the Macbook power adapters. You will run into so many varying plugs in your travels and the plug extension makes it easier to deal with loose plug connections.
***Something to consider for international traveling is that you will need to get a plug adapter that will work in whatever country you are going to. We are not electricians/scientists but the chargers themselves take care of converting to varying voltages...but the plug adapters are necessary to conform our USA plug configuration to whatever fancy style the that **insert country** uses.
***Something to consider for international traveling is that you will need to get a plug adapter that will work in whatever country you are going to. We are not electricians/scientists but the chargers themselves take care of converting to varying voltages...but the plug adapters are necessary to conform our USA plug configuration to whatever fancy style the that **insert country** uses.

Cards.
We recommend traveling with (2) 32 gb cards...either CF cards, or SD cards will work. We have recently started shooting with the SD cards, because they pop right into the side of our 13" macbook pro laptop for capturing footage...which is nice, because then you don't need to travel with a card reader. That's just one less thing you have to worry about. If you are buying your own cards, we recommend paying for some faster cards...60MB/S or up...and Sandisk has yet to fail us yet...so, we recommend them.


Backpack.
We always travel with a backpack that can fit all of our gear + laptop. This keeps everything in one place, and also allows for you to be extremely mobile while traveling. The bag shown here is a LowePro Runner 350 AW. It is a great option because it fits in overhead bins and has nice padded straps. LensProToGo has a similar bag that they rent called the Tenba Roadie II.
***A Shootsac (or Gnerd Pouch...as we call it) is an incredibly useful companion for on-the-move shooting. Its simple design allows you to break down to the essentials for a day hike or walk around town...while having lenses/batteries/cards/etc. easily accessible. Thanks to @Stillmotion for that amazing recommendation a few years back...life changing :)***
***A Shootsac (or Gnerd Pouch...as we call it) is an incredibly useful companion for on-the-move shooting. Its simple design allows you to break down to the essentials for a day hike or walk around town...while having lenses/batteries/cards/etc. easily accessible. Thanks to @Stillmotion for that amazing recommendation a few years back...life changing :)***

Tripod.
For traveling, we wanted to find a super lightweight tripod, that was solid enough to shoot with a long lens...but light enough to hike and run around with. For this we found the Induro CT414 to be perfect. We highly recommend it for anyone looking to film while hiking. We combined these legs with the manfrotto 701 fluid head, which has worked out well. We always keep a quick release plate on the camera, so throwing a camera on the tripod is always quick and easy.
***Consider purchasing a Manfrotto 438 Compact Leveling Head. Its a bit funky + chunky...but it is a really convenient + semi-compact way to do leveling on the fly. It adds a few pounds (or kilos...depending on what country you are going to :)...but it is definitely worth the extra weight because it is a huge time-saver.***
***Consider purchasing a Manfrotto 438 Compact Leveling Head. Its a bit funky + chunky...but it is a really convenient + semi-compact way to do leveling on the fly. It adds a few pounds (or kilos...depending on what country you are going to :)...but it is definitely worth the extra weight because it is a huge time-saver.***

Tripod TIP.
The nice thing about the Induro tripod is the extender column that is built in. This is helpful with raising/lowering camera to frame your shots...but also acts as a great stabilizer. Simply flip the tripod upside down, and extend the legs to distribute the weight. This is an awesome way to add motion to your shots without having to carry around a steadicam. Its quick and easy...and very effective. Just takes some practice.
***We've found that the upside-down tripod trick works well for us...so, we can avoid the extra weight of another piece of equipment...but if you want something better/more conventional...Lensprotogo rents a bunch of cool options for mini-steadi equipment. ***
Be sure to use the promo code CHOICE for 10% off your entire order (US Residents Only).
Other Options (NOT included in the travel package)
Intervelometer- even if you're not a timelapse expert...it's a fun thing to mess around with...and can add some interesting shots to your final edit. We recommend the $100+ Canon version because it has worked problem-free for us for a few years...but the cheap Amazon/Ebay models are pretty good (and really cheap) if you can plan for their inevitable quirks.
1.4x Extender- sometimes 200mm just isn't far enough...especially with the full-frame sensor of the 5D...so this is a nice/small item to have in the bag. Definitely bring this along if you are filming surfing or any kind of wildlife.
Zoom H4N - having the ability to capture good clean audio while traveling is another important consideration. The Zoom is an amazing tool for capturing cleaner audio than the camera's internal mic. It's extremely easy to use, and is great for live performances and impromptu interviews. If you really want to get serious, you can step it up a notch by adding a Sennheisser ME-66 (good) or 416 (better) shot gun mic + XLR & boom pole (or fashion one out of a stick). For the record, CHOICE was made without any audio equipment...all sound design and VO were added in post.
Other Stuff- Lens cleaner, ND filters, Leatherman multi-tool, watch battery for intervelometer
***One last thought that is REALLY IMPORTANT is hard drive management. If you are going to shoot all of this great stuff...the footage + stills soon become just as valuable as the equipment. No matter where you are in the world.... Shit Happens ...and something that we always try to do is make sure that:
1. We have footage captured internally to the laptop (make sure you plan to have enough space internally for your specific trip)
2. We have a backup on a Lacie Rugged drive that is packed away in a ***different location*** so that if one bag gets stolen you at least have a backup safely hidden.***
Thanks for reading. We hope this was helpful.
In the end, the most important thing is to let your curiosity lead you + always strive to capture the moment in the most unique + colorful way that you can. In other words, chase the hocus-pocus and try to get it in focus. Safe travels.
Enjoy our new video...and feel free to post comments below and/or ask questions on Vimeo, Facebook, or email. THANKS FOR READING.
Tuesday, March 20, 2012
Canon C300: First Impressions
OK. So, we got a chance to use/play/tinker/shoot with the C300 for a few days courtesy of the amazing folks at Lensprotogo.com. Its time to do a little blah blah blogging. Here are our first impressions:


With all of these things attached, it isn't that much heavier than the 1D. It is somewhat less awkward to shoot handheld because the top handle and/or hand grip makes everything feel really ergonomically balanced. That being said, the bulkier nature of the camera definitely makes it a little less portable. For instance, it might be tough/financially frightening to hang it out of a moving vehicle upside-down on a monopod (which we've been know to do with the DSLRs). Also, it definitely has that "I'm a professional cameraman" vibe which is good in some situations (impressing clients) and not-so-good in others (sneaking shots in public places).

AUDIO:
The Bad:
When all is said and done...the only thing that is really important is: How does the footage look?
My first thought is that it certainly isn't going to start another revolution...but at the same time...it somehow still feels like a necessary step up. I don't know if I can quite put my finger on it...but it definitely seems sharper...and because of that...even the stuff that is out of focus seems like a more quality bokeh.
After the first day of shooting, I came back to my hotel room (slightly intoxicated) and scrubbed through the footage. To my slightly drunken eyes, there was definitely a bump in quality, but at the same time I don't know if I would have been over the moon if we had just dropped $16,000 to get that small bump. The colors also seem a bit flatter and less saturated...but this is probably a good thing for color correction.
After shooting with it for another two days, it was apparent that certain shots really benefitted from whatever improvements they made with this camera. I think the true realization came when we went back to the 1D after sending the C300 back. It almost felt that when shooting at F1.2 or F1.4, nothing was truly in focus...and the stuff that is out focus...is crazy out of focus....which is cool for some things, but not everything.
I'm not sure if that is helpful at all...or even makes any sense... but I think that those small differences do make a big difference in creating a professional product for clients. I might prefer to use the DSLRs on personal/travel projects because they are just more fun/simple to use...but the fact that the speedier processor reduces wobble AND moire plus extra overall sharpness just seems like a necessary step up as we tackle bigger projects. Also, the codec seems much more robust...and no long, overnight transcoding is a dream come true.
The Good:
The Bad:
Overall, it is a pretty great camera with a lot of cool features. Feel free to email questions to gnarlybay@gmail.com or post below.
Thanks for reading....AND HUGE THANKS to www.lensprotogo.com for letting us check out the camera.


This camera will be weighed heavily against its much cheaper predecessors…the 5D, 7D, and 1D…it might be unfair, but I guess its unavoidable. The DSLRs truly created a revolution in providing filmmakers/hobbyists easy access to a cinematic experience. The saturated look running at 24p coupled with the shallow depth of field has taken over. These amazing cameras provided an ease-of-use + portability that is easy to take for granted. So, the first thing that we were curious about was how different the form-factor and functions would be.

Size Matters:
The camera itself isn't that big. It has just a bit more girth than the 1D...BUT...then you have three pretty necessary attachments.
- The hot-shoe-mounted handle
- The (awkwardly) swiveling hand grip
- The monitor
You can operate the camera without these things using the eye-piece...which is cool...but for most things...these three attachments will come into play.

Monitoring and Playback:
The hot shoe mounted monitor really hit the mark with form and function. It swivels into all sorts of crazy configurations, and I'm not sure what the resolution/pixel specs are on the display, but overall it seems like a pretty great monitor. It has all of the nerdy things you might need...like waveform monitors and all sorts of focus assisting tools.
The Good:
- Zoomed focus assist...while filming. AWESOME.
- Eye-piece for bright sun. It even cleverly pulls out and tilts up for easier low angle shots. COOL.
- The clamshell design of the monitor allows for more more playback controls like FF and REW.
- An external monitor doesn't steal the feed like a DSLR. However, mini-HDMI is replaced by full sized HDMI. This left us without a way to connect to our SmallHD monitor on Day1...but it is easy enough to pick up these cords from any electronics store.
- SDI-Out and more...see pic below:

The Bad:
- Focus assist can't be moved around the screen like a DSLR...it just zooms into the center of the frame.
- When you turn off display info...absolutely nothing is displayed. This might be able to be tweaked in the menus, but with nothing on the screen, it was really strange that there is no record indicator. You have to see that the light on the camera body is blinking. Also, there is no indication that you are zoomed into the focus assist...so it is entirely possible to be filming thinking that you are tight on something when you are actually recording a wide shot.
- The cables connecting the monitor seem a little cumbersome...and it was difficult to unplug them...but I was probably doing it wrong.
- Playback isn't as instant as a DSLR. You have to switch to 'media' mode and it takes a few seconds to boot up the thumbnails. This is reminiscent of the Sony EX...and it definitely seemed like they had it right with the DSLRs.
We didn't have a manual with our rental...so, we went a full day shooting with this camera with no audio. Then, we spent another day trying to find the setting in the menus. We finally googled it, only to find out....THERE IS NO INTERNAL MIC. Crazy. So, in order to get audio you have to use a shotgun mic in the holder with the XLR inputs. Once you get over the absurdity of there being no internal mic, its really not the biggest deal, but it definitely makes the camera a bit bulkier than it already is...and adds one more step to a run n' gun setup. Nonetheless, it is nice that this camera has the built in XLRs...even though the DSLRs have gotten us comfortable with the old school nature of the dual system audio capturing using the Sound Devices 702...and a shotgun on a boom pole.
BUTTONS/MENUS:
We've used the DSLRs exclusively for 2+ years now, so we know where all the buttons are...and can pretty much do most things with our eyes closed. The C300 doesn't really have a similar button placement scheme...so, even towards the end of day 3...I still found it slightly cumbersome to switch things like white balance, ISO, and shutter speed. Aperture can be controlled by a dedicated dial on the back, but everything else was changed by clicking through the items on the on-screen display and toggling them once they are highlighted. Now, there must be a different way to do this...but that seemed like the easiest way without creating user-defined options. Again, this is very reminiscent of the Sony EX1 design...and something that I feel was really improved upon with the DSLRs.
The Good:
- ND filters. These filters are just a click away and they flip up in a cool way. AWESOME.
- Record buttons galore
- There are a lot of options for user defined buttons...so I would assume that most issues can be solved
The Bad:
- Slow motion is buried in the menus....and takes 3 steps to accomplish. The first thing we did was put all these necessary menu items in the customized 'my menu.' So, when you want to switch from 1080/24p into slomo, you have to do 3 steps
- Switch into 720/24p.
- Choose the frames per second (you can choose 1-60 frames)
- Finally, the step that i forgot to do more than once...you have to turn ON Slow&Fast record mode in another menu item. So, even when all of those things are added to 'my menu', its still a bit of a process to switch over. I wonder if there would be a User Defined button that could do all of that with one click. That would be cool. Once again, this reminds me a lot of the Sony EX1...and thats not a good thing. Also, this goes without saying BUT it would have been amazing if it did at least 120 fps (or higher)...OR if the 60 fps was at least 1080p.
IMAGE QUALITY:
When all is said and done...the only thing that is really important is: How does the footage look?
My first thought is that it certainly isn't going to start another revolution...but at the same time...it somehow still feels like a necessary step up. I don't know if I can quite put my finger on it...but it definitely seems sharper...and because of that...even the stuff that is out of focus seems like a more quality bokeh.
After the first day of shooting, I came back to my hotel room (slightly intoxicated) and scrubbed through the footage. To my slightly drunken eyes, there was definitely a bump in quality, but at the same time I don't know if I would have been over the moon if we had just dropped $16,000 to get that small bump. The colors also seem a bit flatter and less saturated...but this is probably a good thing for color correction.
After shooting with it for another two days, it was apparent that certain shots really benefitted from whatever improvements they made with this camera. I think the true realization came when we went back to the 1D after sending the C300 back. It almost felt that when shooting at F1.2 or F1.4, nothing was truly in focus...and the stuff that is out focus...is crazy out of focus....which is cool for some things, but not everything.
I'm not sure if that is helpful at all...or even makes any sense... but I think that those small differences do make a big difference in creating a professional product for clients. I might prefer to use the DSLRs on personal/travel projects because they are just more fun/simple to use...but the fact that the speedier processor reduces wobble AND moire plus extra overall sharpness just seems like a necessary step up as we tackle bigger projects. Also, the codec seems much more robust...and no long, overnight transcoding is a dream come true.
The Good:
- The MXF codec is able to be captured directly to PRORES through Log and Transfer in Final Cut Pro. This is a HUGE timesaver...and could be worth the price of admission alone.
- Moire reduction. Moire is a nerdy word that came to our attention when we first shot with the DSLRs. We would ask ourselves shoot after shoot...why is this roof OR brick facade OR suit jacket going all crazy with rainbow madness. Moire. Our first shoot with the C300, we were shooting in a hotel/casino with a lot of tight patterns, and we specifically wanted to test the moire reduction claims. Overall, it seems like an improvement, but its not moire-free...some surfaces are just too crazy for any of these cameras to handle.
- Wobble Reduction. AKA: The Jello Effect is supposed to be a be a lot less noticeable on this camera. We mostly shot on jib, dolly, tripod for these shoots...so unfortunately we weren't able to really test it...but that is an exciting thing...if it is true.
- Low light. We didn't get to test this all that much but it seemed to be grain-free at even 3200. The fact that it can go up beyond 12000 ISO is just crazy...and could be pretty useful.
The Bad:
- Timelapses. With DSLRs, its really nice to be able to take giant resolution, long-exposure stills to stitch into a timelapse. It just seems like a bit of a bummer that you can't do this on this very expensive camera. In 1920x1080 resolution, you can shoot 1 FPS with the S&F record mode OR do 1 frame at different intervals...but it seems like a huge step backwards...to the land of the Sony EX1.
WORKFLOW:
There are a few strange and potentially dangerous things that we encountered
- CF Card Management. If you are used to being able to pop a card into the camera and shoot like on DSLRs...the C300 is a bit different. You have to initialize (C300s way of saying FORMAT) a CF card before being able to film with it. So, that means that if you have 12 GB of footage from shooting with a DSLR the day before...and you put the card into the C300. It will ask you to 'Initialize Media' in order to proceed to filming. So, you might click over to MEDIA mode to check if there is any footage before initializing the card and erasing all of its contents. The problem is that the DSLR footage will not show up as thumbnails...and the card will appear to be empty. Beware.
- Slow Motion Corrupts Clips: We ran into a problem when we were filming slow motion that would freeze recording and come up with an error message that says "Clip Appears Damaged. Would you like to Repair? Yes or No" We figured out that this only happens with 30MB/S CF Cards. Nonetheless, if you have a bunch of 30 MB/S card laying around...and you're used to them working flawlessly in a DSLR....Beware. :)
The last bit of advice would be for the capturing stage. You will need the Canon MXF software plugin for Final Cut Pro in order to ingest the footage as PRORES files.
Thanks for reading....AND HUGE THANKS to www.lensprotogo.com for letting us check out the camera.
-Kenny Bloggins


Monday, November 28, 2011
Seeing RED
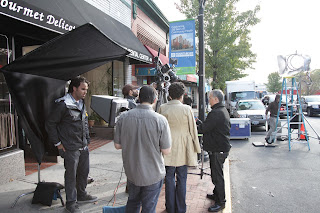
Gnarly Bay has been busy in the past few months, some of us getting married and others traveling to far off corners of the world in search of inspiration. On a recent shoot with McCann-Erickson for Verizon Fios, we got our hands on a RED Epic. A big thanks to Brian Stansfield and the crew from DC that made this trip up with the camera and gear. We shot on location in Montclair, New Jersey. It will be on tv and internet pre-roll nationwide, so be on the lookout! Here's a couple of behind the scenes shots


Tuesday, June 7, 2011
"Canon 7d Test: No Woman, No Cry" Raw Footage
Hello Gnarly Gninjas,
We’ve gotten lots of comments about the “Canon 7D Test: No Woman, No Cry” video on Youtube. This was a one-camera test video, but a lot of people were concerned that there was some foul play involved with another rogue camera angle that snuck into the edit. These are a few of our favorite youtube comments:
@gnarlybay please explain) maybe you have two cameras and your friend took from the other corner
strannik 1 month ago
OR
The jump shot at 2:09 is impossible if the band doesn't play the song twice or if you don't have a second camera. Or if you're Harry Potter getting into video.
Anyway great editing and video.
Cheers.
xavlexav 5 months ago
We really appreciate the attention and conspiracy theories, but before the Mythbuster weirdoes come to The Bay, flaunting their berets and fantastic facial hair, we’d like to address some of those myth-conceptions. Lisp.
So, here is the raw footage. If you’re feeling super ambitious...
CLICK HERE TO DOWNLOAD THE RAW FOOTAGE AND PROJECT ASSETS (969 mb)
When everything is downloaded, double click the project file. You’ll need FCP7 to make everything work. We compressed the assets to 640x360 PRORES LT codec, so that the folder is quicker to download (969 mb total), but the quality will be diminished from the HD originals. Also, we lumped all of the b-roll shots into one clip to separate it from the main 2 original clips of the “No Woman, No Cry” performance. Lastly, the audio clip was 3 hours long because we captured the whole night with the zoom H4n, so we provided the original “No Woman, No Cry” snippet and the sneakily edited version from the video. Compare and contrast. It will give you a closer look into the mythical madness, and you can stir the witch’s cauldron a bit.
It really was just a test…with booze involved. We had just gotten an early shipment of this exciting new contraption that day, and we were excited to try it out. At the time, we only had a 4GB card and a 2GB card. We actually ran out of memory on the 4GB card in the middle of “No Woman, No Cry”…so there was a gap during the card-swap, and as you’ll see from the footage/edit, the added effort was put into covering those mistakes with looping/re-using parts of the song and fragments of other footage captured throughout the night…therein LIES the trickery or tomfoolery or shenaniganiliciousness…nonetheless, real eyes, realize, real LIES….and there are no real LIES in this video…only TRUE LIES…whatever that means…Get to tha chopper.
Also, looking back, it’s interesting to see that we really pushed the ISO to the brink. Most of the band footage was around ISO400, but the crowd stuff quickly bumped up to ISO3200 and beyond. That first day/night, I remember being blown away by the low-light capabilities. You can almost film in the dark with high ISOs and an F1.4 lens, but when we got the footage on the computer, we quickly realized that the 7D should be limited to 800 ISO to avoid crazy grain. Nonetheless, we were primarily shooting with an EX1/M2 encore at the time…so it was a HUGE improvement over that light sensitivity. We haven’t looked back since.
We hope you enjoy this journey into the archives…nothing super-fancy…but thanks for watching.
Gnarly.
Gnarly.
Tuesday, April 5, 2011
My My My Poker Face!
Last week the guys drove up to beautiful New Hampshire to film another Easter Poker Tour Tournament of Champions! Or EPTTOC if your like us and like to shorten everything into cool slang. Along the way we stopped to see our friends at Lens Pro To Go, http://www.lensprotogo.com/, great bunch of people who helped us out with all the video equipment we needed for the shoot. Then after a quick stop for some chicken parm subs, it was off we went to do some filming. Check out http://www.easternpokertour.com/ for updates on when the show will air, or if you just want to get down and play some poker!
Also for all our UK fans out there...has anyone seen Dan and Dana? they have been roaming London for the past week. The first person to send us a photo of them in the UK wins the grand prize!
Also for all our UK fans out there...has anyone seen Dan and Dana? they have been roaming London for the past week. The first person to send us a photo of them in the UK wins the grand prize!
Friday, March 18, 2011
Westerly High gets Gnarly
Ahoy there!
Today Gnarly Bay decided to inspire the minds of the young film makers of Westerly High School. Mr. Albamonti's Film class came in for a little visit to the Bay to learn hands on how the Gnarly boys go about their business. We shared stories, secrets, knowledge, donuts, and even a tear of joy. There is a lot of talent in the local kids, and hopefully we will be getting a few a them into the Bay as interns very soon. Check out one of the students videos called "Fight Scene" by Brian Keefe
~Shawn
Subscribe to:
Posts (Atom)